27/04/2013: Almost May already! This year is going so fast!
02/04/2013: Happy Easter. I hope everyone had a fantastic weekend.
01/01/2013: Happy New Year!!
24/12/2012: Merry Christmas!!
13/11/2012: Getting hand-made presents ready for Christmas!!
02/04/2013: Happy Easter. I hope everyone had a fantastic weekend.
01/01/2013: Happy New Year!!
24/12/2012: Merry Christmas!!
13/11/2012: Getting hand-made presents ready for Christmas!!
Sunday, February 28, 2010
Oh Dear!
Firstly my sincerest apologies to those waiting patiently for the next installment of the quilt along. I just wanted to check in and say... I'm still alive and have been thinking about you all!
I've been spending daylight hours working on renovations which are taking longer than expected and between that and work I have been so very tired. I don't even know what happened to the last week. It was over far too quickly! I hope to get back on track this week, however please take this opportunity to catch up if you need to.
Monday, February 15, 2010
Rotary Blades
I know when I first used my rotary cutter I fell in love with how easy they are to use and how quick they make cutting your pieces. I have a 45mm standard Olfa rotary cutter and earlier this year I realised how dull my blade had become. I don't know what it is like in other countries, but here in Australia it cost me $10 to purchase one replacement blade.
Imagine my surprise when I discovered a pack of 5 on ebay for barely more than I spent on one!! I knew I had to see if the seller was up to scratch.
Well if you use a rotary blade, Birdbrain Collectibles and Scrapbooking is a seller you should add to your bookmarks! I ended up buying a couple of things from her as she responded to my questions within the hour. Generally I am happy if I get a reply by the next day, so I was astounded by her prompt and polite service. My package of goodies arrived in a timely manner. I purchased a pack of 5 rotary blades which should last me a while yet.
She informed me she doesn't carry all stock all the time, however she does seem to have a regular supply of rotary blades in her store so I am sure she will keep getting them in if people keep buying them.
She sells in packs of 5, 10 or 15 and between her prices and her amazing service I am sure you will be pleased.
Wednesday, February 10, 2010
New Toy - 1/4" Foot
I have a new toy to play with! I am saving it until after I've finished my current projects though so it can have a fresh start. The foot on the right is the one I normally use. It has a centre guide line and a line that is good enough for a 1/4" however it is not always perfect... I am getting better though.
The foot on the left is a specially designed 1/4" foot for my Janome. I bought it on ebay because (unfortunately) it was half the price of the ones I could get from my local store. The black guide bar on the right of the foot allows the fabric to be guided through easily and on my test piece I had a perfect 1/4" seam over a 5" length! I didn't even have to think about guiding the fabric accurately.
I'm sure this foot is going to make things easier. Perhaps I should just start using it straight away, although I have it in my head that if I do that now my current quilts will end up with an obvious difference in them - a perfect half and a not so perfect half. I am probably just being silly though!
Monday, February 8, 2010
Piecing Perfect Corners
Being self-taught, I have experimented with different pressing and joining techniques. While I prefer pressing seams open as I feel it gives a flatter result, there are times when pressing to one side helps you to obtain a perfect corner. This is one of those times and we can use this technique in this weeks blocks.
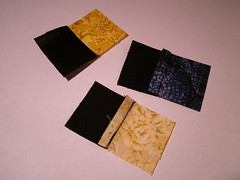
I'm joining my 1.5" squares together, so first I join a black to a colour with a 1/4" seam. You can use the chain piecing method to make this go faster if you like. Next I press the seams towards the black with my iron.
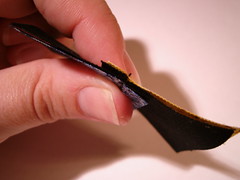
Now we need to line up our centre corners. When you take your two pieces and put them together you will notice that the seams are facing opposite directions. When the corner is lined up correctly you will feel that they seem like the pieces are interlocked. Initially I found it helped to pin at this point and I still do pin when sewing a larger project - for example I used this method to line up the rows from my rainbow basket weave quilt. With something as small as this I find pinning unnecessary.
Of course we're using a 1/4" seam to join these blocks together as well. Don't be afraid to unpick your stitching and have another go if you are not happy with the results.
Have a look at your work! If you are happy with it, press the seams open. You can see that the corners have lined up perfectly. Enlarge the photo and have a close look if you like.
I hope this helps you with your piecing. Time for me to get on with my other blocks from this week...
Sunday, February 7, 2010
Using Every Scrap
Because my fabric is very limited for the Raid Your Stash quilt along I am trying to be as frugal as possible. I want to try and have some fabric from each colour left over so I am trying not to waste any fabric at all and throwing out only the most minute scraps.
The smallest unit we've been using is a 1.5" square so any piece larger than this is saved and set aside. We've usually been using sizes in combinations from 1.5" up to 3" so as I cut my pieces I try to mix these up. For example, a 3" cut in half will give us 1.5" blocks. A 2.5" strip can be set aside to use later when more 2.5" sections are needed, etc.
Before cutting I spread out my fat quarter and think about the best way to cut the least amount of fabric to get the pieces I need for the next block. I also mix up the colours according to the amount of fabric I need. Some blocks only need a small amount of fabric from one colour and more from another, so I ration out the fabric according to how much I have left instead of choosing the colours I want to go together. This is giving my some interesting colours I may not have otherwise picked.
Are you quiltig along with me? How are you rationing your fabric?
Do you ration fabric like this with other projects and try to use every little scrap?
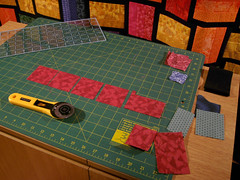
Oh! In the background there you can see the rainbow basket weave quilt top. It is finally together and hanging on my curtain rail ready to be quilted. I am extremely happy with it and must have learnt something lately because all my corners line up perfectly. I think it is the best quilt top I've made yet!
Subscribe to:
Posts (Atom)


