
Stitch and Press
Being self-taught, I have experimented with different pressing and joining techniques. While I prefer pressing seams open as I feel it gives a flatter result, there are times when pressing to one side helps you to obtain a perfect corner. This is one of those times and we can use this technique in this weeks blocks.
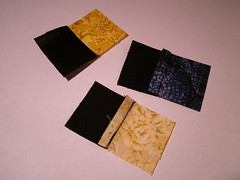
I'm joining my 1.5" squares together, so first I join a black to a colour with a 1/4" seam. You can use the chain piecing method to make this go faster if you like. Next I press the seams towards the black with my iron.
Line up the Seams
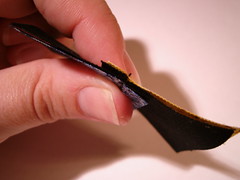
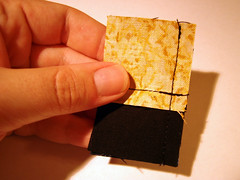
Now we need to line up our centre corners. When you take your two pieces and put them together you will notice that the seams are facing opposite directions. When the corner is lined up correctly you will feel that they seem like the pieces are interlocked. Initially I found it helped to pin at this point and I still do pin when sewing a larger project - for example I used this method to line up the rows from my rainbow basket weave quilt. With something as small as this I find pinning unnecessary.
Stitch...
Of course we're using a 1/4" seam to join these blocks together as well. Don't be afraid to unpick your stitching and have another go if you are not happy with the results.
Open up and Check
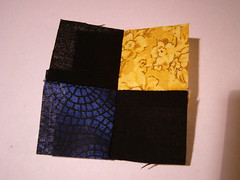
Have a look at your work! If you are happy with it, press the seams open. You can see that the corners have lined up perfectly. Enlarge the photo and have a close look if you like.
I hope this helps you with your piecing. Time for me to get on with my other blocks from this week...
No comments:
Post a Comment