27/04/2013: Almost May already! This year is going so fast!
02/04/2013: Happy Easter. I hope everyone had a fantastic weekend.
01/01/2013: Happy New Year!!
24/12/2012: Merry Christmas!!
13/11/2012: Getting hand-made presents ready for Christmas!!

Tuesday, December 20, 2011

Hexagons... where are they now?


My poor neglected little blog!! I have been sewing, but it is slow going and I haven't had regular time to spend.

So this is my hexagon progress up to now... The first of these was finished in November, the last was finished this week. I decided to make my hexagons into "blocks" of 3x3. I think the longest part is that I need to baste all those little triangles as I go and I'm stitching it together by hand. I think it will be worth it though.

As I sew I select 9 hexagons that are reasonably complimentary and pleasing. I'm hoping that from that I can then match them together as blocks to form a larger quilt top that will be "random" and yet have enough organisation of colours to be pleasing. The black triangles are my crazy idea to let each colour have room to speak for itself. Look at the little stars that are starting to appear in the centre of the triangle!! I love it!

I haven't seen anyone do anything with little triangles on a hexagon quilt. Please share a link if you've seen something like this before.

Tuesday, September 20, 2011

Making Diamonds from Hexagons


As I'm making tiny triangles I am sewing 2 to each hexagon on opposite ends. This should hopefully speed up the joining process as I should be able to start joining them in rows.

My plan at the moment is to make 3x3 diamonds and then join those together and fill in the edges. The pattern will be selectively random, but as you can hopefully see, the black is setting off the colour so each hexagon will stand on its own merit and not fade into the other fabrics.

Those triangles are so tiny! Only just bigger than my thumb nail. I've found that I have to be more accurate on the triangles, but sewing them together does leave a little wiggle room and pulls it all back together again if I'm a tiny amount off. Hopefully I can maintain a good level of accuracy.


A big bowl of colourful hexagons! I've made 150 of these at last count. There are a couple of very light tan hexagons that I might not use now that I'm starting to sew them together though.

Saturday, September 10, 2011

Hexagons... Meet Triangles


I've basted 150 hexagons now and as I've been sewing I've been putting a lot of thought into what I'm going to do with them. One thing I've been disappointed in is that I don't like how they look when they're laid out next to each other. The colours start to run into each other and it becomes harder to pick out the individual fabrics.

I may have found a pleasing solution which is even more insane than creating 1 inch hexagons.... and that is creating 1 inch triangles.

Those tiny things are 1 inch tirangles. They are created in the same method as the hexagons - by basting around a paper base. I can't fold the corners in as I have seen instructions show as the pieces become too bulky to achieve sharp corners. However folding in each side and basting seems to be working well and I am achieving the result I am after, even though they are a lot harder to make as they are so small.

I'll take a photo of a few pieces sewn together soon so you can see how my idea is panning out.

Friday, September 2, 2011

More Hexagons


This is what hexagon madness looks like. I've cut the paper templates myself from normal printer paper using a fantastic template sheet which makes this step so easy and kind of relaxing. It was a perfect thing to occupy my hands on a day when all I wanted to do was sit and soak up the first bit of sun this spring.

The easiest way to baste 1 inch hexagons is to start with a 2.5" square of fabric and then fold and finger press the fabric along the paper, taking a stitch at each corner to hold the fabric in place. Once you do the first couple you can easily get into a rhythm and I have been finding this quite relaxing. If you need some help with basting basics here is a fantastic video tutorial on how to baste a hexagon using this method.

Now I admit that when I was more of a novice to quilting it was hard for me to fathom why anyone would want to hand sew these little babies when it is easy enough to cut a hexagon and sew it on a machine. I have sewn larger hexagons together with a machine with quite good accuracy which you can see below, but I can not imagine achieving this accuracy with these tiny pieces.

Moulin Rouge - skirt

Back to my tiny inchies... Next is deciding what to do with them. The plan is to make a charm quilt - which means only one piece of each fabric with no duplicates - but I am not sure whether to do a random pattern or organise it into a colour spectrum. I'll deliberate while I make more hexagons.

If you'd like to jump in and make some hexagons of your own please explore the links above. Remember you don't have to do things exactly the same as I am, or the same as Texas Freckles whose pages I have been referencing because I'm sure there are many ways to achieve the same results.

Wednesday, August 31, 2011

Beginning of Hexagons


May was the last time I posted?! Well hasn't it been a while dear followers. I hope you are all well.

I'm not really sure what happened there. A little bit of lost mojo and a little bit of other creativity taking time, like drawing... but I can safely say I have done a fair bit of sewing the last couple of weeks and it is all hand sewing too!

I've been bitten by the hexagon bug. I tried to ignore it and work on other projects, but the call was too strong. Eventually I just cut the hexagon templates and they sat in a draw for a week, but again the pull was too strong and suddenly I had 50 hexagons basted.

I'll post some more progress over the coming weeks. These little babies are 1 inch hexagons and I'm starting off going through my stash and creating one of each fabric.

Thursday, May 26, 2011

Textile Mail Art Project


I've had so much fun making ATCs recently and through the connections I’ve made with people overseas I’ve discovered a beautiful idea called the Textile Mail Art Project. The idea is to have artists from all around the world submit a piece of original artwork based on the theme of textiles. This has got me a little excited at the limitless possibilities for having a real play around with the materials we all use in quilting and extending the experimentation I am doing with ATCs into a slightly larger format.

The deadline for this project has been extended to October 31, 2011 so there is still time to join in if you would like to make something for this project.

Go check it out and have a look at some of the gorgeous projects that have been submitted so far!

http://textile-mail-art-project.blogspot.com

Saturday, May 21, 2011

Give Away!


I've just finished off the pattern for the steampunk filigree butterfly for Happy Bobbin and thought it might be time for a give away since I've reached my first dozen patterns.

If you'd like a chance to win a free pattern of your choice - perhaps the chicken purse or the owl applique? - there are 5 ways to enter, so please head over to the Happy Bobbin Blog to learn more!!

While we're at it, there is a 20% off sale until June 5th too!

Tuesday, May 17, 2011

Point, Click, Quilt


I don't think I have ever pre-ordered a book before, but the preview images from the author have thoroughly intrigued me. The only down side is I have to wait 3 months before I can get my hands on it!

The authors blog has two beautiful examples on offer at the moment. First is Papillon from the cover showing a little of her blending techniques and the original photo inspiration. Second is Rusty Chevys and the detail in the glass, cars and road is exquisite. The images are simplified, yet still quite detailed. Can you tell I'm excited??

If this has piqued your interest and you'd like to order this book too you can get a good price, free shipping plus another 10% off with the code "May11" (from their homepage) at Book Depository.

I highly recommend Book Depository as I can rarely find a better price and have had great experiences through them.

Saturday, May 7, 2011

Electronics and... Sewing?


What on earth has this got to do with sewing?? Well now that my basic circuit is working and I know how to put the batteries into those neat little battery holders I am going to start working on an electro-textiles project.

Electro-textiles started with wearable computers and surface mounted displays and has evolved into conductive threads and yarns which can enable you to build an electronic circuit in your textile garment or object. To me, conductive thread just sounds fascinating and I knew when I discovered it about a year ago that it was something I wanted to play with at some stage.

I've finally got myself some conductive thread which I am going to use to sew a circuit into an art piece to enable LED lights to light up when the switch is turned on. I decided to build a switch into my project to make it more convenient than having to remove the battery from the holder each time you want to turn the LEDs off.

There are a number of applications where electro-textiles are being used today. Many costumers are beginning to use LEDs in their projects, but on a more practical level people in colder climates are using conductive thread sewn into the fingertips of their gloves in order to use touch screens on computers and mobile phones while staying warm.

Well I am off to continue on with my project. I need to finish the base before I can start sewing in my LEDs and I am eager to see this one finished!!

Have you had a play with electro-textiles? Or can you think of some nifty applications for this emerging technology?

Monday, May 2, 2011

Bottled Toy ATC


I wanted to share this even though I won't be sending it to whoever I get as my swap partner for a couple of weeks yet. This is a little Artist Trading Card (ATC) which is only 2.5" x 3.5". It was made for a challenge where 2 out of 5 theme words needed to be used in one ATC. I was the one who started the challenge and I still found it hard!!

I thought I'd post it up here because I'm really happy with how it turned out and I don't think my potential swap partners are watching this blog, though perhaps if you want to join in too you might get it!!

I started off with a rough design sketched on paper after tossing up ideas for a couple of weeks. I was going to try and do something with the words Duet and Cultivate... or Journey and Cultivate... but then I thought about a ship in a bottle and the idea took form - so this suits the challenge words Bottled and Toy.

The design is made up of cut fabrics that have been raw-edge appliqued to a base fabric. I used a sheer piece of white fabric over the top which is transparant enough for the bottle. To finish, there are 3 or 4 layers of interfacing between the front and back layers and then I used a quilt binding technique for the edges which gives a great border.

What do you think? Would you like to receive this ATC in the mail? Or would you just like to try out the challenge yourself. Well there is still time to sign up so check out the challenge before the 8th of May!!

If you have any questions about making fabric ATCs let me know!

Saturday, April 30, 2011

Steampunk QAYG Quilt Progress

I've been doing a fair bit of reading about how to Quilt As You Go as I am getting closer to the point where I will be assembling my Steampunk quilt blocks. Here is a quick peek at where I'm up to - a long time in the making considering I started this quilt back in August 2010.


8 of the 12 planned Steampunk blocks

With the Quilt As You Go method of quilting I'll be taking each of these blocks and quilting them before they are sewn together. They will be assembled with black sashing between each block into a grid of 3x4. I think this is the easy part... what has had me procrastinating and searching the internet is how to add a border, rather than finish the set of blocks off with just a binding.

I've been asking on blogs and forums with limited success. I believe the adding of borders to a QAYG quilt is something that is usually taught in a class and hard to explain without being able to show step by step photos, but I've never been one to take classes and I've never let a little gap in knowledge stop me from trying anything - don't worry, I'll document the method I end up using so you can have a go too!

What I think I'll end up doing at this stage is add the border the same as I will the blocks which will mean an extra 8 pieces - 4 sides and 4 corners - in order to make the sashing pieces look symmetrical. The sashing should look the same on the front and back, but the back will be completely black unless I change my mind between now and quilting.

The octopus is the most recent addition to the Steampunk set and was developed from conception to execution in a really short time - only about 2 weeks! I had the idea for him not long ago, while other designs are still sitting in my notebook. I really love some of the more abstract Steampunk icons creeping into this quilt.

Friday, April 29, 2011

Out with the Old...

... and in with a brand new look!!

My blog was starting to look brown and dull to me so it was time to spring clean and freshen up. I needed some colour and now I think I'm happy and ready to unveil it to you!


The Old...

This really was a little more trouble than I expected. I built the new site in a test environment and when I thought I was ready, copied it across... but unfortunately a lot of unexpected things happened. First all my little gadgets broke and I had to readd everything to my sidebar. Next I realised there was no blog navigation, so no way to get to any of my previous posts. Finally I realised the comment form was completely broken.

Happily I was able to fix everything, but not without a few headaches. In fact it has taken me about 6 hours longer than I expected and turned into two evenings work instead of one, but I am happy with the results. The old hints through from the background, but the green and white lifts and brightens everything up.

Thanks for your continued visits everyone. Let me know what you think of the new blog.

PS: There are six hens hidden around the site too!!

Wednesday, April 13, 2011

Because side projects and hobbies are important!

... but is there such a thing as "too much"?

I feel like every week I add a new thing to my list of things I'd like to do when I get home from my day job. Do you do this too or are you content with picking one hobby and sticking to it?

I wonder sometimes if I'm overdoing it. Actually I wonder that a lot and sometimes I burn out and have a week of procrastination... or two. And I'll procrastinate about everything! I won't sew, draw, or even exercise. I'll plonk myself infront of the television or computer, but I won't blog, I won't even read blogs. I'll do nothing.

What a waste of time! However, I think these weeks are my body and brain going "critical mass reached, system shutdown initiated..... rebooting brain"

Well I've had a couple of weeks like this and now I'm back at things with a fresh frenzy. The unfortunate thing is that during these weeks of nothing I have a tendency to come out of it with a dozen brand new ideas which I must try NOW.

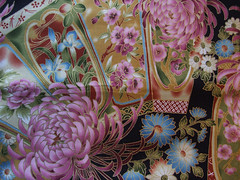
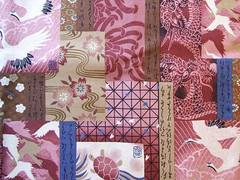
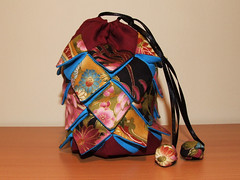
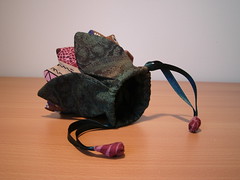
ATC Swaps is a perfect example of this. This is actually a a bit of fun. I'm justifying it as my excuse to make a mess and get dirty with things I don't usually use in my art. The pieces are so small that it only takes me an hour or two to follow a tangent and them I'm free to go back to my bigger projects. What a great load of justification right there... of course I haven't mentioned the number of hours I've put into setting up the new blog and planning out a few months worth of small projects, or the fact that I want to make all these little projects NOW, not in a few months.

My Sketchbook Project is another perfect example. I didn't quite get through the last 30 day challenge, but I did learn a number of things and gained confidence. I am itching to start another one, but know I should wait a little longer. Maybe I'll start May 1. I'll let you all know.

I *need* to make things right now. I *need* to be doing things with my hands. This week I've made 3 ATCs, all our wedding "save the dates", jumped on my exercise bike every day, been super productive and up to date at work... I've been shunning the television and the internet, I've been walking to the shops instead of driving, I've been cuddling chickens. Anything that gets me moving, making, creating, observing - the senses scream for stimulation!!

Most of all I have ideas and not enough time. I know the burn out will be back in a week or two so I'm doing as much as I can while my enthusiasm is high. Another positive to my creative side is that daylight savings is over. I tend to focus better in the evening when it is dark as I don't feel that I'm "wasting" a beautiful day indoors. The downside is less daylight means less time to cuddle my chickens because they go to sleep just after I get home from work. But at least I can get started on projects by 7-8pm instead of just coming inside from outdoors some nights at around 9pm in the summer.

Well it is good to get all that out. I need to create, create, create!! What are you working on right now? Send me a link to your current project if you've got a blog entry!

Friday, April 1, 2011

Sewing and Swaps


Long time no post! I have been sewing though.

I finished another applique for my "steampunk motifs" quilt. This one is a crown. I really love how it looks and want to do another one in blues or pinks. I need a little princess to give it to though, so perhaps that will have to wait until a future time.

The last few months have been full of lots of ideas and not enough time to execute them all. I always get into these modes and then get frustrated at having to spend my 9-5 at my day job...


Do you want to do something fun with me?

I've started making fabric ATCs because I want some little things to do so I can learn some new techniques and have a play around. An ATC is an Artist Trading Card - a little project only 2.5"x3.5" which is usually swapped with others (or you could just keep them yourself).

I've started a swap with the first technique - Check it out here. Sign up this time is only 2 weeks, but the next one will have a full month to sign up. I'll run one a month so join in at any time.


I've also got a few pre-loved embroidery magazines in my shop for a really good price. If you love embroidery, these magazines are absolutely stunning. Check them out here

And I promise I'll post some actual sewing soon!!

Saturday, January 8, 2011

Omiyage Fabric Selection

Picture 835
Robert Kauffman - Imperial Collection

This is the fabric I used on the Pinecone Omiyage. As you can see there are quite a few different elements to this fabric and I carefully selected different focus points for each square. I actually cut quite a few extra squares of this fabric and then selected the ones that featured nice sections of the design and balanced the colours with the black and maroon.

Fabric
Unknown Fabric Designer

Unfortunately I can't tell you who makes this fabric. I found this in the oriental section of my local fantastic quilt fabric store. I also found a purple colourway when I was at the 2010 Quilt & Craft Fair and bought a fat quarter of it. This pink colourway was used to make the Sakura Omiyage. I really loved each of the motifs - the turtles, cranes, sakura blossoms and oriental dragons, and I tried to pick out one of these motifs on each of the Sakura Omiyage petals.

Please comment if you recognise this fabric so I can note who the designer is.

Wednesday, January 5, 2011

Completed Omiyage

Pinecone Omiyage
Pinecone Omiyage

YES! It was finished in time for Christmas and received by a delighted Oma. When she got it home she said it even matched a bedspread one of her friends made her some years ago. Mark must have subconsciously channeled his colour memory when I asked his opinion of what colours to use.

As I have mentioned previously, this design is from the book "Omiyage" by Kumiko Sudo. My suggestions for anyone attempting her patterns is to expect to handsew most of it. The patterns are small and intricate. The pinecone is made up of lots of small squares sewn in such a way that they form the pattern. It all had to be hand sewn because there was no way I could get the machine into the tiny places and hold all the fabric just so as I sewed. There is a nice sized pouch inside, which I actually made a little larger than the pattern specified.

Sakura Omiyage
Sakura Omiyage

This is another design from Kumiko Sudo's book. I made this for a good friend of mine and I know she has received it so I don't have to keep it secret anymore. I was able to machine sew the start of the petals, but the rest was all handsewn. The back has a little pouch, so small you can only fit tiny trinkets, but it is a really pretty design.

Sakura Omiyage (back)
Back of Sakura Omiyage

Here is a view of the back with the pouch open. I don't know if you can see from the photos, but the little tassle ends are also different. The Sakura had rectangular tassle ends with no padding, where the Pinecone had square tassle ends with a small piece of batting to pad it. I liked trying the different tassle ends to see which I preferred and I do love the padded ends on the Pinecone a little more. There are 5 different ways to do fabric bead tassle ends in the book.

I know I've been asked what fabric I used on these designs as well. I will find the fabrics and photograph them for you soon.