27/04/2013: Almost May already! This year is going so fast!
02/04/2013: Happy Easter. I hope everyone had a fantastic weekend.
01/01/2013: Happy New Year!!
24/12/2012: Merry Christmas!!
13/11/2012: Getting hand-made presents ready for Christmas!!

Friday, September 24, 2010

Steampunk Butterfly

Steampunk Butterfly
Steampunk Butterfly

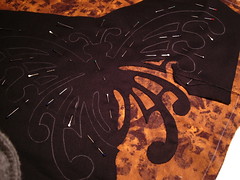
What makes this steampunk? For me it is the ornate look that reminds me of wrought iron and combined with my other designs I think this will look great! I think this block has taken the longest to sew out of the six I have completed so far. Do you like the look of this block and the gears from the last post? I'm hoping to have a full range of patterns ready so that you can make this too once I've completed the quilt.

I keep changing my mind now whether I will quilt as I go then join the blocks together, or make up the quilt top and then quilt. I want to keep it fairly simple so that the intricate applique can speak for this. I'm loving the colours... I just need to get the remaining designs drawn up and then stitched on.

The six completed designs include the gears and butterfly, a fleur de lis, a steampunk airship, some keys and a cameo bust. The remaining designs will include a crown, some tools and a steampunk gun with hopefully a total of either 9 or 12 applique designs overall which will be dependant on how the size of the completed quilt is looking.

I've got plans for a second steampunk quilt too. The beautiful brassy colours combines with black are just too nice not to use again.

Saturday, August 7, 2010

Cogs and Gears

Steampunk Quilt Teaser
Gears in Progress

This is a little bit of a teaser and reinvention of what I'm doing at the moment. I realised recently while reading all the usual blogs I visit that so many things we make are a recreation of the same straight lines and defined patterns. I'm throwing all that out the window!!

What this means is that the raid your stash quilt-a-long is probably dead and buried for a while. I have no desire to work on complex straight line piecing at the moment. I want curves, dynamic ideas, pictures, a story... perhaps this is Leah Day's fault with her phenominal quilts and inspiring free-motion quilting, but I also think I am finally on track to what attracted me to quilting in the first place.

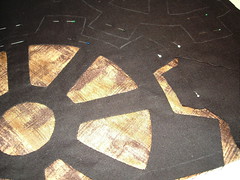
This week I've been working on using my cog or gear design which I showed you how to make by folding paper. This is the first of a series of designs that are rattling around in my head and I plan on turning them all into printable patterns for you too!

I'm not sure whether this counts as reverse applique or not, but I have been reading through Applique in Reverse by Teri Henderson Tope and there is so much potential from this technique.

Yesterday I discovered a problem... I'd been using a black polyester thread to do my applique and while pressing under a hot iron it melted! Of course I should have known better... and I have just finished re-sewing my edges with a 100% cotton thread. It is extremely important to use a 100% cotton or silk thread which won't melt when you iron!!

Tuesday, August 3, 2010

How to make a Symetrical Template


Steampunk Cog Template (step 6)

1. Take an A4 sheet of paper and fold it diagonally to create a triangle. Cut off the overlap so you are left with a square sheet of paper that is folded diagonally.

2. Fold your paper diagonally a second time.

3. Fold diagonally again. You might want to fold up one side then flip over and fold up the other side to reduce bulk and ensure all your folds are crisp and sharp.

4. To create a perfect circle, use a compas to carefully mark from the closest point. Put the point of the compass on the point which is the centre of your paper where all the folds come together.


(step 4)

5. Mark a design on the paper that you like. In this instance I'm making a cog, so I've used the compass to mark more circles then drawn some lines connecting them. I didn't draw the lines from the point as I want the joinin areas so be the same thickness all along, not thinner at the centre and wider at the edge.


(step 5)

6. Cut along the lines, then unfold - Just like making a paper snowflake when you were young!

7. Experiment!! Depending on how you fold will depend on your symmetry.

I used this method to create a shape and drew around it to create my cog design to follow when quilting. You could use any kind of fabric marker to transfer your design, and you know it is going to be symmetrical and look great!!

This creates a cog that is approximately 20cm wide. You could make it smaller or larger depending on the size of your paper.

Monday, August 2, 2010

What is Steampunk?

_DSC0988
Local Steampunk Enthusiasts

What is Steampunk? That is a great question, and as I've got a few projects going at the moment inspired by Steampunk lets try and answer it.

Steampunk is a relatively new branch of science fiction and speculative fiction. It is the imagining of an alternate history where we think what would today be like, if technology had continued its focus on steam power and clockwork rather than advances into electricity. It usually borrows heavily from Victorian era clothing and aesthetics including the colours, textures (wood, brass) and technology.

You may have heard of HG Wells or Jules Verne who are seen as huge influences of the style or seen cartoons like Steamboy or Laputa Castle in the Sky. Even movies like Stardust, Van Helsing, Sherlock Holmes (2009) and The League of Extraordinary Gentlemen have been influenced by steampunk.

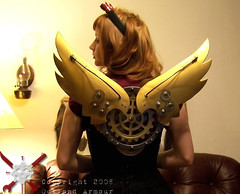
The best way to get the gist of the style is of course in pictures, so here are a few more of my favourite steampunk costumers: (all photos can be clicked to see larger!)

Steam Punk Worlds Fair Clockwork Wings

Shot and Steel Liberated Libations Steam Punk Worlds Fair Pachydermos

Friday, July 23, 2010

Steampunk Inspired

Steampunk inspired bag
Steampunk Inspired Design

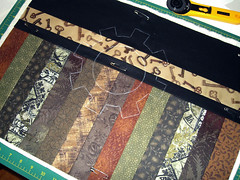
I want a little bag to take a sketchbook with me and since I have been very inspired by a lot of old fashioned ideas recently I used a little of some fabrics I've been hoarding to put together a little bag. I've just started quilting it - I'm drawing out my design as I go using two paper template and a tailors chalk pencil, then stitching around the design on my machine. Perhaps I should have hand stitched it to make it look more rustic... It will be subtle, but hopefully an interesting touch to those who notice.

Would anyone be interested in some step by step's once it is done, including how to make a symetrical machine cog pattern very easily?

Has anyone got any advice to share on my reverse applique thoughts? Have you done any of these techniques?

Monday, July 19, 2010

Reverse Applique Thoughts

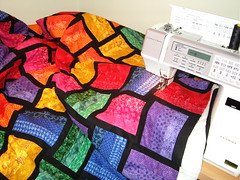
Quilting a Rainbow
Rainbow Quilt

I've been quiet, but sewing has been happening. The rainbow is ready for binding and I've completed another small project too. More on that another time.

I'd love to know if any of you have tried any of the stained glass techniques. I've been doing some research into these techniques and I'm eagerly awaiting the arrival of Reverse Applique from Book Depository. I've also browsed the internet and youtube for tips and tricks and I've found there are three different techniques that can be used.

1. Use fusible bias tape to divide the coloured areas. This technique can leave visible stitching depending on how you sew down the bias tape.

2. Place black fabric over the coloured areas, then clip and hand sew to leave the outline you desire. This technique uses a lot of basting, but leaves no visible stitching.

3. A relatively new technique where the black fabric is covered with a fusible interfacing such as vlisoflex. Areas are then cut out and filled with colour leaving a black border which is then sewn with a narrow zigzag. (see a video tutorial)

My question is... have you completed or seen any of these techniques? Which did you prefer?

I think the pattern I am currently designing is too complex for the bias tape method as I have areas which become wider than 1/4". I am unsure whether I should spend the time and use the second technique so that the quilting will be the only visible stitching, or whether I should just go for simplicity and do point 3 which I think would be a lot quicker. What do you think?

Sunday, March 28, 2010

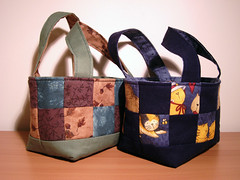
Patchwork Baskets

Patchwork Fabric Basket
Patchwork Baskets

Another "in a day" project as I have been so uninspired and really need to get on with the quilt along. If only there were more hours for sleep this week!

With Easter coming up I made a last minute decision to whip up some gifts to go with the chocolate. I was inspired by a photo on flickr and then hunted around to find a bag tutorial. This pattern matched the idea I had in my head perfectly!

The instructions are very easy to follow and I whipped up the green bag in a couple of hours as a tester. Then I fussy cut cats from Debbi Mumm fabric I had in my stash and made up the blue cat bag which will go to my Nanna filled with easter goodies.

Saturday, March 20, 2010

Small Purse

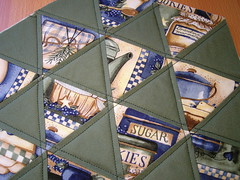
Patchwork - Green Kitchen Memories
Quilted Kitchen Memories

Remember this fabric which I bought last october? I trimmed off a crooked edge today and fussy cut some triangles to work on a small project. I'm hoping this will help bring my mojo back!!

It has been so hectic around here that I haven't been doing any sewing. I have a tonne of things I want to get to and no energy. I can now tell you all that I am starting a new job on Monday, so the last 2-3 weeks have been a whirlwind of interviews, filling out forms, meeting new people and finishing up at my last job. I had been at my previous job for 8 years, so I must say I am a little nervous about the change, but I know it is the right thing for me right now.

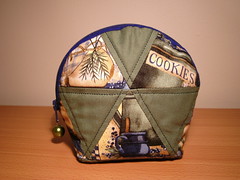
Little Bag/Purse
Finished Purse or Bag

I tried out several new things with this little project. First was the fussy cutting. I made a template for an equilateral triangle out of thick clear plastic - you can use the 60° line on a quilting ruler to draw your triangle! I found that if I was careful I could use my plastic template with my rotary cutter, so it didn't take too long to have quite a few triangles cut out. The clear plastic made fussy cutting a breeze. I marked my 1/4" seam allowance on the plastic and then just lined up the image and cut.

After piecing my triangles together I decided to use another new toy - Quilt Basting Spray. It is a dream to work with and held everything together without any pinning while I quilted. Next I made up my bag using instructions from Quiltsalott. My bag is a little smaller as I made my pattern just under 6" so that it fit on an A4 piece of paper. I adjusted her measurements by dividing by her width of 8" then multiplying by my width in all cases which kept the ratios the same.

I've always wanted to have a go at a bag like this, and this one is really easy. The finish is beautiful with no raw edges anywhere, although finishing the zip and the inner corners was a little fiddly. I photographed the back view as well, where you can see I reversed the direction of the triangles so that both sides would feature the kitchen fabric right way up.

Sunday, February 28, 2010

Oh Dear!

Grout and 2 coats of paint
My most recent project

Firstly my sincerest apologies to those waiting patiently for the next installment of the quilt along. I just wanted to check in and say... I'm still alive and have been thinking about you all!

I've been spending daylight hours working on renovations which are taking longer than expected and between that and work I have been so very tired. I don't even know what happened to the last week. It was over far too quickly! I hope to get back on track this week, however please take this opportunity to catch up if you need to.

Monday, February 15, 2010

Rotary Blades


Rotary Cutter Blade

I know when I first used my rotary cutter I fell in love with how easy they are to use and how quick they make cutting your pieces. I have a 45mm standard Olfa rotary cutter and earlier this year I realised how dull my blade had become. I don't know what it is like in other countries, but here in Australia it cost me $10 to purchase one replacement blade.

Imagine my surprise when I discovered a pack of 5 on ebay for barely more than I spent on one!! I knew I had to see if the seller was up to scratch.

Well if you use a rotary blade, Birdbrain Collectibles and Scrapbooking is a seller you should add to your bookmarks! I ended up buying a couple of things from her as she responded to my questions within the hour. Generally I am happy if I get a reply by the next day, so I was astounded by her prompt and polite service. My package of goodies arrived in a timely manner. I purchased a pack of 5 rotary blades which should last me a while yet.

She informed me she doesn't carry all stock all the time, however she does seem to have a regular supply of rotary blades in her store so I am sure she will keep getting them in if people keep buying them.

She sells in packs of 5, 10 or 15 and between her prices and her amazing service I am sure you will be pleased.

Wednesday, February 10, 2010

New Toy - 1/4" Foot

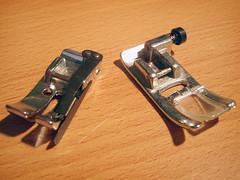
Sewing Machine Feet
Sewing Machine Feet

I have a new toy to play with! I am saving it until after I've finished my current projects though so it can have a fresh start. The foot on the right is the one I normally use. It has a centre guide line and a line that is good enough for a 1/4" however it is not always perfect... I am getting better though.

The foot on the left is a specially designed 1/4" foot for my Janome. I bought it on ebay because (unfortunately) it was half the price of the ones I could get from my local store. The black guide bar on the right of the foot allows the fabric to be guided through easily and on my test piece I had a perfect 1/4" seam over a 5" length! I didn't even have to think about guiding the fabric accurately.

I'm sure this foot is going to make things easier. Perhaps I should just start using it straight away, although I have it in my head that if I do that now my current quilts will end up with an obvious difference in them - a perfect half and a not so perfect half. I am probably just being silly though!

Monday, February 8, 2010

Piecing Perfect Corners

Perfect Corners 1
Stitch and Press

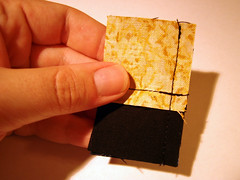
Being self-taught, I have experimented with different pressing and joining techniques. While I prefer pressing seams open as I feel it gives a flatter result, there are times when pressing to one side helps you to obtain a perfect corner. This is one of those times and we can use this technique in this weeks blocks.

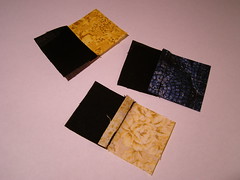
I'm joining my 1.5" squares together, so first I join a black to a colour with a 1/4" seam. You can use the chain piecing method to make this go faster if you like. Next I press the seams towards the black with my iron.

Perfect Corners 2
Line up the Seams

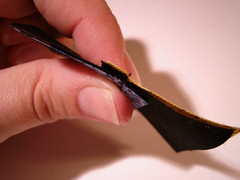
Now we need to line up our centre corners. When you take your two pieces and put them together you will notice that the seams are facing opposite directions. When the corner is lined up correctly you will feel that they seem like the pieces are interlocked. Initially I found it helped to pin at this point and I still do pin when sewing a larger project - for example I used this method to line up the rows from my rainbow basket weave quilt. With something as small as this I find pinning unnecessary.

Perfect Corners 3
Stitch...

Of course we're using a 1/4" seam to join these blocks together as well. Don't be afraid to unpick your stitching and have another go if you are not happy with the results.

Perfect Corners 4
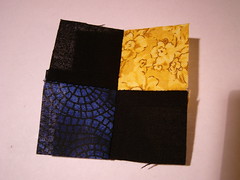
Open up and Check

Have a look at your work! If you are happy with it, press the seams open. You can see that the corners have lined up perfectly. Enlarge the photo and have a close look if you like.

I hope this helps you with your piecing. Time for me to get on with my other blocks from this week...

Sunday, February 7, 2010

Using Every Scrap

Using every scrap
Cutting Scraps

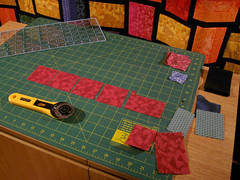
Because my fabric is very limited for the Raid Your Stash quilt along I am trying to be as frugal as possible. I want to try and have some fabric from each colour left over so I am trying not to waste any fabric at all and throwing out only the most minute scraps.

The smallest unit we've been using is a 1.5" square so any piece larger than this is saved and set aside. We've usually been using sizes in combinations from 1.5" up to 3" so as I cut my pieces I try to mix these up. For example, a 3" cut in half will give us 1.5" blocks. A 2.5" strip can be set aside to use later when more 2.5" sections are needed, etc.

Before cutting I spread out my fat quarter and think about the best way to cut the least amount of fabric to get the pieces I need for the next block. I also mix up the colours according to the amount of fabric I need. Some blocks only need a small amount of fabric from one colour and more from another, so I ration out the fabric according to how much I have left instead of choosing the colours I want to go together. This is giving my some interesting colours I may not have otherwise picked.

Are you quiltig along with me? How are you rationing your fabric?
Do you ration fabric like this with other projects and try to use every little scrap?

Oh! In the background there you can see the rainbow basket weave quilt top. It is finally together and hanging on my curtain rail ready to be quilted. I am extremely happy with it and must have learnt something lately because all my corners line up perfectly. I think it is the best quilt top I've made yet!

Sunday, January 24, 2010

More Fabric!

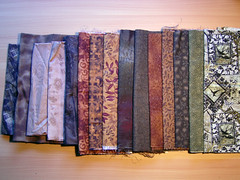
Fabric Haul
Inspired by Tarnished Metal

I headed out to Tricia's Discount Fabrics yesterday with two aims - to show a good friend a fantastic fabric store, and to increase my stash.

I have a specific purpose in mind for this fabric, however I am still working on my patterns at the moment. It may be some time before I can show off what I will eventually make with this lot, but I am very excited about it.

The 5 fabrics on the left are a little scrunched as they were pre-cut fat quarters and need an iron. The rest I bought 1/4 metre of each. At the far right is a stunning fabric from what I believe may be a new line: "Floragraphix III Swallow Clock In The Beginning Fabric".

The discovery of that last fabric made me rethink some of my choices and add in a green. Finding "tarnished" greens is quite difficult though.

I'm excited! I hope you'll stay in touch to find out what I'll be making from this selection over the next few months or possibly over the rest of this year. As always, click on the photo for a larger view.

Sunday, January 17, 2010

Patchwork Classroom #71

パッチワーク 教室 No.71

Here is a closer look at one of my Japanese Mooks*. This is Patchwork Classroom Volume 71 which contained the beautiful Tea Set which I made in December last year.

Japanese Craft/Sewing mooks all tend to follow a similar format from my experience. The front half contains beautiful photographic images of all the projects with short descriptions (in Japanese) and a page number to the back section. This makes for a beautiful contrast to Australian magazines which tend to follow each project with the instructions. The Japanese magazines are more elegantly designed for browsing and admiring the projects within.

Inside the Magazine

The second half of the magazine contains the instructions for all the projects in sepia or black and white. There is also a lift out pattern sheet. This magazine is 114 pages with approximately 70 dedicated to project photos and advertising and 45 pages of project instructions. I counted 48 different projects and there is a heavy focus on bags and purses throughout this issue (approx 2/3) with only a few wall hangings and zakka** projects included.

The reason I chose this book is primarily because of its focus on bags. There is a treasure trove of bag designs within the magazine and a few of the styles show what the same bag would look like if you complete the patchwork, or the colours, or the quilting in a different way. This really helps you see the potential for customisation of the projects.

A point to remember is that these projects are usually designed for hand piecing and hand quilting and so the instructions are based around particular hand sewing techniques, however I don't see anything stopping you from using your preferred techniques with their patterns.

Example of Instructions Provided

If you are interested in Japanese magazines, but do not understand the language then you need not fear. Page numbers and measurements are all in standard western numerals while the instructions contain much more detailed diagrams than you would find in western craft magazines. If you take some time to explore your mook you will soon learn where to find the page reference for the instructions and how to skim through the written instructions and match characters to understand your fabric requirements and notions. I would recommend these magazines to intermediate quilters or sewers to avoid frustration unless you are fluent in Japanese.

Are you interested in this exact magazine. Buy it now on ebay. (I have bought from and recommend this seller, but I am not affiliated with them in any way)

* Mook - A hybrid between magazine and book.
** Zakka - Handmade household goods such as tableware or soft furnishings usually also charming or cute. This tea set would be considered "zakka".