27/04/2013: Almost May already! This year is going so fast!
02/04/2013: Happy Easter. I hope everyone had a fantastic weekend.
01/01/2013: Happy New Year!!
24/12/2012: Merry Christmas!!
13/11/2012: Getting hand-made presents ready for Christmas!!

Wednesday, January 5, 2011

Completed Omiyage

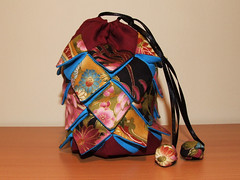
Pinecone Omiyage
Pinecone Omiyage

YES! It was finished in time for Christmas and received by a delighted Oma. When she got it home she said it even matched a bedspread one of her friends made her some years ago. Mark must have subconsciously channeled his colour memory when I asked his opinion of what colours to use.

As I have mentioned previously, this design is from the book "Omiyage" by Kumiko Sudo. My suggestions for anyone attempting her patterns is to expect to handsew most of it. The patterns are small and intricate. The pinecone is made up of lots of small squares sewn in such a way that they form the pattern. It all had to be hand sewn because there was no way I could get the machine into the tiny places and hold all the fabric just so as I sewed. There is a nice sized pouch inside, which I actually made a little larger than the pattern specified.
Sakura Omiyage
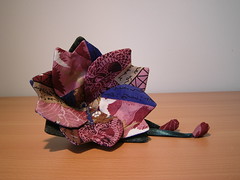
Sakura Omiyage

This is another design from Kumiko Sudo's book. I made this for a good friend of mine and I know she has received it so I don't have to keep it secret anymore. I was able to machine sew the start of the petals, but the rest was all handsewn. The back has a little pouch, so small you can only fit tiny trinkets, but it is a really pretty design.
Sakura Omiyage (back)
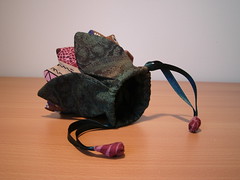
Back of Sakura Omiyage

Here is a view of the back with the pouch open. I don't know if you can see from the photos, but the little tassle ends are also different. The Sakura had rectangular tassle ends with no padding, where the Pinecone had square tassle ends with a small piece of batting to pad it. I liked trying the different tassle ends to see which I preferred and I do love the padded ends on the Pinecone a little more. There are 5 different ways to do fabric bead tassle ends in the book.

I know I've been asked what fabric I used on these designs as well. I will find the fabrics and photograph them for you soon.
Sunday, December 19, 2010

Omiyage Progress

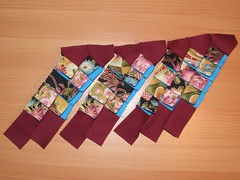
Pine Cone Omiyage progress
Omiyage Progress

I'm running out of time for the pinecone omiyage, but it will get done before Christmas. This has definately been a hand sewing project. Hand sewing is the only way I've been able to get all those little sides joined together with precision. If I tried to machine this I think it would be a big mess by now.

Well... back to sewing!

Sunday, December 5, 2010

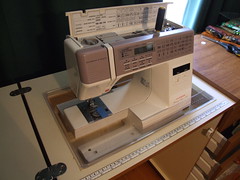
Flat Bed Sewing is a Go!

Flat Bed Setup
Flat Bed Insert for my Janome

I picked up the new insert for my sewing cabinet yesterday but still haven't found the time to try it out yet. I'm really happy it fits the cabinet and machine considering that little piece of plastic cost $80! (almost twice as much as the second hand cabinet!)

I'm about to go and do some sewing. I've been so busy lately but I have a few things to finish before Christmas so I need to utilise my time to the max, which will probably mean less blogging. If you're wondering what else I've been doing, the drawing challenge is going well and takes up around 30 minutes a day - sometimes the bulk of my spare time before bed. Check out the daily sketches on My Sketchbook.

The new insert means that I have a spare insert for a Husqvana/Viking machine. The serial number of the insert is #180 and I can ship it to you in the sturdy carboard my replacement came in. It has a mark from masking tape on the front which will come off and a couple of scratches. They're usually AU$80 new and I'm asking for AU$20+postage. Buy the feet (below) as well and I'll ship it all together. Click for more details and photos.

Postage is:
$15 within Australia - Express Post
$22-30 international depending on your location

What machine are these for?
Husqvana/Viking sewing machine feet

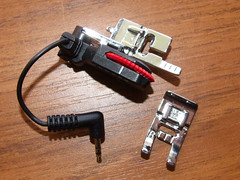
Two Husqvana machine feet - These are a buttonhole sensor foot (usually $120, but I'm asking AU$60) and utility foot B (usually $25, but I'm asking AU$10). These feet are for sale in my online shop, but if you're interested and think my prices are too high on them please get in touch and tell me what you think they're worth.

Special blog offer - buy all 3 for AU$100 including shipping anywhere in the world.
All prices are AU$

Friday, November 19, 2010

30 Day Art Challenge


Video by Suzi Blu

I'm about to start another 30 day drawing challenge this Sunday in order to try and improve my confidence in sketching. I think I may be kidding myself that I have the time to do this one, but with a fresh urge to draw I'm going with the flow and drawing is a great skill for planning sewing projects.

If you'd like to follow along with me and draw as well I'd love to see your blog if you'll be posting your progress online. Any skill levels - the more the merrier! Head over to My Art Sketchbook to learn more about the challenge.

Sunday, November 14, 2010

Stash Building & Projects

new fabrics
More Fabric Purchases

Ok, now I really have to start using from my stash... but Most of these were $2-4/m on sale so I couldn't resist. There are also a few fat quarters and a couple of fabrics that I have an immediate idea for. We'll see if I can get some things constructed soon.

I also ordered a new insert for flat bed sewing... $82.50! I was hoping it would be a bit cheaper, but I need it. That makes my total cost for my new sewing cabinet at about $130 which is still less than they're going on ebay at the moment and it will all suit my machine - at least this is how I'm justifying paying $80 for a piece of plastic!

owl
Woodland Owl Applique

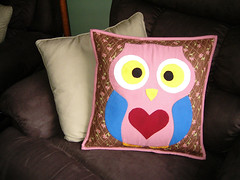
This cute guy was completed a while ago but I've been working on preparing a pattern to share for him as well. The pattern is now available in the shop!! He is my own pattern which I appliqued, then the background was quilted and turned into a cushion cover.

Omiyage in progress
Pine Cone Omiyage in Progress

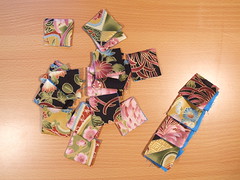
Are you making any Christmas presents this year? I've got a couple of projects to complete. This is my progress on a rather tricky pattern from the book Omiyage by Kumiko Sudo. I am hand sewing it now because the pieces became too small to get lined up on the machine. I have 6 lots of 4 squares to join together and then it is assembled into a little bag.

Tuesday, November 9, 2010

New Cabinet

Sewing Cabinet
New Sewing Cabinet

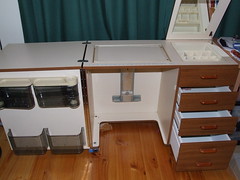
Have a look at my little bargain! This little second-hand beauty cost me $45 and had treasures in the drawers as well!!

I'd toyed with the idea of getting a cabinet with a lift mechanism for flat bed sewing for a month or so now. I had seen a similar cabinet in the local Spotlight (sewing/fabric store in Australia) for $825. I turned to ebay and started bidding on likely suspects. Each time the cabinets I wanted were going for over $150 with the seller saying they were $399 brand new. Perseverance paid off in the end and I am still pinching myself over this bargain!

There was a little repair work to do. The wheels had started to come off the bottom so 2 washers later ($3.60) and it's all good. The lifting mechanism seems to work well, but the plastic surround doesn't fit my machine so next weekend I need to go ask questions of the local sewing stores and see if I can buy the surround separately.

All the "junk" that came with the cabinet
Treasures?

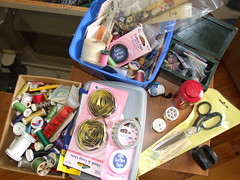
What about the treasures? I was asked if it was OK if some sewing things were left in the cabinet... I said it was absolutely OK. After sorting through it all I discovered a good pair of scissors, a box of buttons, several unopened packets of elastic and cotton tape, about 15-20 spools of Gutermann thread (some unopened still in plastic), 2 spools of gold thread and several packets of needles.

What machine are these for?
Husqvana/Viking sewing machine feet

There were also two Husqvana machine feet. Does anyone have a Husqvana/Viking machine? These are a buttonhole sensor foot and utility foot B. These feet are for sale in my online shop, but if you're interested and think my prices are too high on them please get in touch and tell me what you think they're worth.

Friday, November 5, 2010

Quilt Show 2010

Quilt Show Hoard
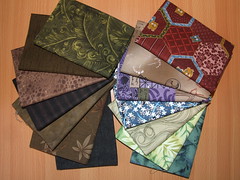
New to the Stash

Today I went to the local annual quilt fair and I want to say first that this year I had a GREAT time! Long time readers might remember that last year I had several negative experiences of people not wanting to talk to me. This year I happily avoided the stalls who didn't want to know me last year and after a happy hour looking at the stalls only ended up spending at one stall.

Once again I want to do a general gripe about prices. I saw one stall with fat 1/8ths for $10.95 each... What the? Please tell me none of you actually pay this price!? That works out to over $80/m and I'm pretty sure printed cotton is not made from spun gold! The other pricey fabric I saw was japanese imports that were $32/m... sure they were nice and I was tempted, but ebay is there for a reason! Honestly quilt stores, you have to get more competative!

The fabric that I did purchase was all from my favourite stall which I think was Patchwork with Gailb from Victoria. I imagine her store is a little like Tricia's Discount Fabrics here in South Australia - every fat 1/4 was $3.50 so I spent $50 there! That is how you turn over product. You make it affordable!

What price will you pay for fabric?

My price range is $12-16/m for printed quilters cotton. Under this is a bargain (I've got some for $2/m sometimes), but up to $20/m is acceptable if it is something special. Up to $8/m for flat colours as I can often get a reasonable range for as little as $4-5/m regularly. For fat 1/4s I calculate what I pay based on the price per metre. So that means I will generally only pay up to $4 per fat 1/4 as per my rule with printed quilters cotton.

Now on to my wonderful chats. Yes! People talked to me this year! My first win was talking to a lady who made an amazing quilt with extremely fine applique and hand quilted it as well. She had used batik which is thinner than quilters cotton and she gave me a small piece of batik fabric to take home (I didn't buy any because I need to research my prices as all the batik fat 1/4s were $8 or over that I saw)

A batik weave is tighter - more threads per square inch which means it doesn't fray as readily and you can clip it up to 1/16 from your seam when doing needle turn applique. It is also thinner than quilters cotton so it is not as bulky and can move around tighter corners easier.

She also said DONT IRON your applique! ...but my book on applique says press! Next time I won't be ironing during or post applique and see how it turns out!

My other highlight from the day was discussing a quilt with a couple of ladies while pointing out the flaws and that it didn't matter because all of us would still be more than happy to have such a beautiful quilt in our homes. Then we were talking about whether the quilting was human or computer directed and I recommended they check out the work of Leah Day because it could also be done on a domestic machine!! I hope they follow up my recommendation and check out her website.

All in all, a great 3 hours spent at the quilt fair this year!!

Friday, October 29, 2010

Spoonflower


I've talked about Spoonflower in the past when I had a photo printed onto quilters cotton to incorporate into a quilt. At the moment with the Australian Dollar being so high compared to the US$ it is very tempting to jump in and buy a whole heap of beautiful custom printed fabric.

I've been receiving the newsletters from Spoonflower for a number of months now and they often have design competitions allowing the general public to vote for their favourites. There have been so many beautiful designs lately that I've decided to start sharing my favourites from each competition. You might like to sign up to their newsletter and do the same!

I voted for 9 fabrics this time for the theme "Woodland Creatures". I've linked my top 6 above in no particular order.

Sunday, October 17, 2010

Quilting Scraps

Scrap Box
Scrap Box

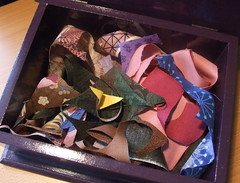
I've been saving up all my scraps from recent projects as I recently bought a copy of the book Serendipity Quilts by Susan Carlson however I can't try out one of the amazing projects until I collect a pile of scraps to choose from.

Previously I would only save the scraps I deemed "worthwhile", but now I'm saving all my scraps no matter how tiny. It feels good to think I might one day have a use for all of them. Do you save your scraps?

Sunday, October 10, 2010

Chicken Purse


Chicken Purse

This weekend I've been thinking a lot about chickens as one of our girls has a broken wing. So its not surprising that a chicken appeared in my sewing this weekend.

This little purse has been made into a pattern and is now in my brand new shop! Head over to Happy Bobbin to check it out. I ended up making two little chicken purses as I was testing the pattern. If you'd like one they're both for sale too. I also have a blog specifically for my shop here which will be updated as I add new patterns.

If you were to purchase a quilting or quilt related pattern for anything in the world what would you want?

My style is quite ecclectic and unique. I'm currently working on turning all my steampunk blocks into patterns and have a few more ideas in my sketchbook too.

If you also like stitching why not check out another free resource I'm working on. Free Sampler Patterns is hosting a great little range of cross stitch designs perfect for small motifs or making your own custom sampler.

Saturday, October 2, 2010

Sewline Mechanical Pencil

Trying Sewline Pencil
Sewline pencil comparisson

The Sewline mechanical pencil is something that Leah Day from Free Motion Quilting uses and recommends and right before purchasing one from her online store I spotted them in a local shop near my workplace and grabbed one as the price was comparable.

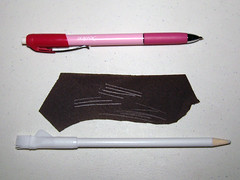
The first thing I did is try it out on some black cotton fabric alongside my usual dress-makers pencil. As you can see from the photo (click to enlarge) the top seven lines from the Sewline pencil are sharper and darker than the dress-makers pencil which I am always sharpening. The eraser on top of the Sewline pencil is good for erasing those lines, but I have not had much need of it. The lines also erase in water. I've had some lines rub off while handling and thankfully this isn't a problem with the Sewline. The lines become a little lighter with excessive handling while hand sewing, but still hold on very well.

For AU$16.95 the Sewline mechanical pencil is not the cheapest accessory I've bought, but I don't know how I've lived without it. I usually use a lot of darker colours so the white is perfect for me, however it also comes in green and pink with refills available for all colours. I've also seen yellow and black/grey online, but not in local stores.

If you're in South Australia I've now discovered two stores who stock the Sewline range of pencils, and fabric glue. In Adelaide, the Button Bar in Adelaide Arcade, or just to the South, Tricia's Discount Fabric near Castle Plaza. If you're in America you should try Leah Day who stocks all 5 colours for US$12.95.

Looking for quilting inspiration? I'm posting some beautiful and inspiring quilts three times a week on Quiltopia. Come have a look! :-)

Friday, September 24, 2010

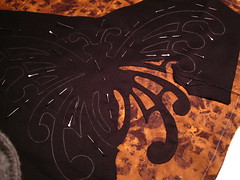
Steampunk Butterfly

Steampunk Butterfly
Steampunk Butterfly

What makes this steampunk? For me it is the ornate look that reminds me of wrought iron and combined with my other designs I think this will look great! I think this block has taken the longest to sew out of the six I have completed so far. Do you like the look of this block and the gears from the last post? I'm hoping to have a full range of patterns ready so that you can make this too once I've completed the quilt.

I keep changing my mind now whether I will quilt as I go then join the blocks together, or make up the quilt top and then quilt. I want to keep it fairly simple so that the intricate applique can speak for this. I'm loving the colours... I just need to get the remaining designs drawn up and then stitched on.

The six completed designs include the gears and butterfly, a fleur de lis, a steampunk airship, some keys and a cameo bust. The remaining designs will include a crown, some tools and a steampunk gun with hopefully a total of either 9 or 12 applique designs overall which will be dependant on how the size of the completed quilt is looking.

I've got plans for a second steampunk quilt too. The beautiful brassy colours combines with black are just too nice not to use again.

Saturday, August 7, 2010

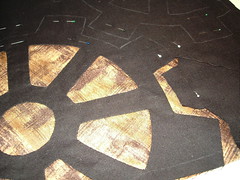
Cogs and Gears

Steampunk Quilt Teaser
Gears in Progress

This is a little bit of a teaser and reinvention of what I'm doing at the moment. I realised recently while reading all the usual blogs I visit that so many things we make are a recreation of the same straight lines and defined patterns. I'm throwing all that out the window!!

What this means is that the raid your stash quilt-a-long is probably dead and buried for a while. I have no desire to work on complex straight line piecing at the moment. I want curves, dynamic ideas, pictures, a story... perhaps this is Leah Day's fault with her phenominal quilts and inspiring free-motion quilting, but I also think I am finally on track to what attracted me to quilting in the first place.

This week I've been working on using my cog or gear design which I showed you how to make by folding paper. This is the first of a series of designs that are rattling around in my head and I plan on turning them all into printable patterns for you too!

I'm not sure whether this counts as reverse applique or not, but I have been reading through Applique in Reverse by Teri Henderson Tope and there is so much potential from this technique.

Yesterday I discovered a problem... I'd been using a black polyester thread to do my applique and while pressing under a hot iron it melted! Of course I should have known better... and I have just finished re-sewing my edges with a 100% cotton thread. It is extremely important to use a 100% cotton or silk thread which won't melt when you iron!!

Tuesday, August 3, 2010

How to make a Symetrical Template


Steampunk Cog Template (step 6)

1. Take an A4 sheet of paper and fold it diagonally to create a triangle. Cut off the overlap so you are left with a square sheet of paper that is folded diagonally.

2. Fold your paper diagonally a second time.

3. Fold diagonally again. You might want to fold up one side then flip over and fold up the other side to reduce bulk and ensure all your folds are crisp and sharp.

4. To create a perfect circle, use a compas to carefully mark from the closest point. Put the point of the compass on the point which is the centre of your paper where all the folds come together.


(step 4)

5. Mark a design on the paper that you like. In this instance I'm making a cog, so I've used the compass to mark more circles then drawn some lines connecting them. I didn't draw the lines from the point as I want the joinin areas so be the same thickness all along, not thinner at the centre and wider at the edge.


(step 5)

6. Cut along the lines, then unfold - Just like making a paper snowflake when you were young!

7. Experiment!! Depending on how you fold will depend on your symmetry.

I used this method to create a shape and drew around it to create my cog design to follow when quilting. You could use any kind of fabric marker to transfer your design, and you know it is going to be symmetrical and look great!!

This creates a cog that is approximately 20cm wide. You could make it smaller or larger depending on the size of your paper.

Monday, August 2, 2010

What is Steampunk?

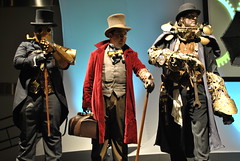
_DSC0988
Local Steampunk Enthusiasts

What is Steampunk? That is a great question, and as I've got a few projects going at the moment inspired by Steampunk lets try and answer it.

Steampunk is a relatively new branch of science fiction and speculative fiction. It is the imagining of an alternate history where we think what would today be like, if technology had continued its focus on steam power and clockwork rather than advances into electricity. It usually borrows heavily from Victorian era clothing and aesthetics including the colours, textures (wood, brass) and technology.

You may have heard of HG Wells or Jules Verne who are seen as huge influences of the style or seen cartoons like Steamboy or Laputa Castle in the Sky. Even movies like Stardust, Van Helsing, Sherlock Holmes (2009) and The League of Extraordinary Gentlemen have been influenced by steampunk.

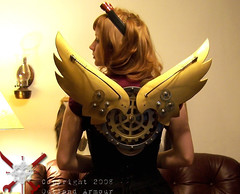
The best way to get the gist of the style is of course in pictures, so here are a few more of my favourite steampunk costumers: (all photos can be clicked to see larger!)

Steam Punk Worlds Fair Clockwork Wings

Shot and Steel Liberated Libations Steam Punk Worlds Fair Pachydermos